In the digital imaging and photography world, effects can transform an ordinary photo into a compelling visual story. One such effect that stands out for its dramatic and cinematic flair is the photeeq lens flare. Whether you’re an amateur photographer, a graphic designer, or a content creator, understanding this tool can elevate your visual content significantly.
What is the photeeq lens flare and How Does It Work?
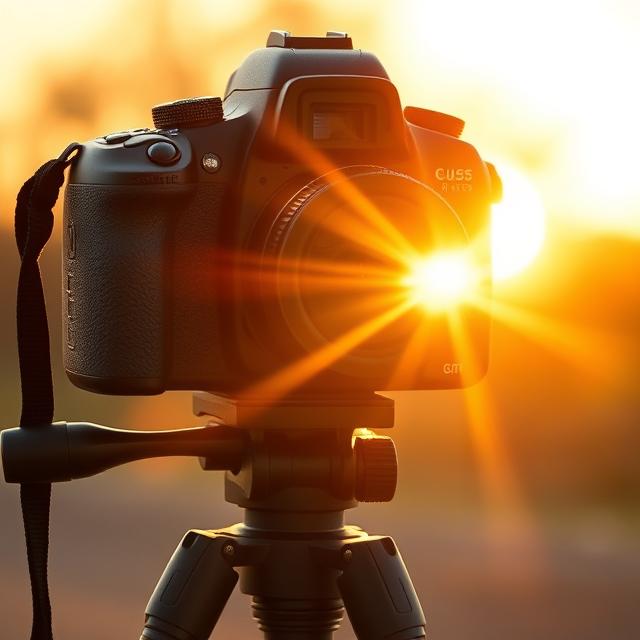
The photeeq lens flare is a visual effect designed to mimic the appearance of light scattering in a camera lens, often seen when a photo is taken directly toward a strong light source. This effect has been popular in movies and high-end photography for years and has now become accessible through editing tools like Photeeq.
This specific tool within the Photeeq suite adds a professional-quality lens flare effect that simulates real-world lighting artifacts. It introduces elegant bursts of light, color halos, and glare lines that emulate the reaction of camera lenses to direct light exposure. The photeeq lens flare can be adjusted in size, position, opacity, and color to match the artistic intent of the user, making it a flexible choice for stylized editing.
Using the photeeq lens flare effectively requires understanding how light behaves in real photography. Strategic placement can enhance highlights, add drama to sunset scenes, or emphasize directional light in portraits. Unlike basic overlays, the photeeq lens flare integrates naturally with the existing lighting and depth of the image, creating a seamless and cinematic finish.
Benefits and Creative Uses of photeeq lens flare
The photeeq lens flare is more than just a flashy addition; it’s a creative asset for storytelling. By incorporating this effect, you can:
- Enhance Mood and Atmosphere: The right flare can suggest warmth, nostalgia, or even surrealism.
- Focus Attention: By drawing the viewer’s eye to a specific part of the image, flares help direct visual focus.
- Add Depth and Realism: Especially in digitally created images, the photeeq lens flare can add a touch of realism that mimics camera optics.
- Highlight Movement and Action: In action shots or videos, a flare can accentuate motion and energy, adding dynamism to the frame.
In addition to these, the photeeq lens flare is favored for its ease of integration with other editing tools. It’s compatible with most major photo editing platforms, which means creatives can add the effect without disrupting their workflow. Whether you’re editing wedding photos, creating digital art, or producing promotional content, this tool fits seamlessly into the editing process.
Final ThoughtsTechnical Specifications of the photeeq lens flare
Understanding the underlying technology behind the photeeq lens flare is essential for users who wish to maximize its potential. This lens flare feature is engineered to replicate natural light interactions based on real optical phenomena. Unlike generic lens flares, which often appear as unrealistic overlays, the photeeq lens flare utilizes vector-based rendering and dynamic light mapping.
This means that the flare adapts to the image’s lighting direction and intensity. When applied, it reads the brightest areas of your image and adjusts its strength and radius accordingly. It also includes chromatic aberration simulation, allowing subtle color splitting that mimics real camera lenses. These technical enhancements ensure a more immersive visual experience and add authenticity to your digital imagery.
Moreover, the photeeq lens flare can be exported in high resolution without pixelation, making it suitable for both web and print applications. Its compatibility with color grading tools and its ability to integrate seamlessly into layer-based editing programs also make it a top choice for professionals working in advertising, film, and digital media.
How to Apply photeeq lens flare in Photo Editing Software
To fully benefit from the photeeq lens flare, it’s important to know how to apply it effectively in photo editing software. While Photeeq may come as a standalone plugin or be integrated with editing suites like Adobe Photoshop, Lightroom, or Affinity Photo, the basic application process remains fairly consistent.
- Import Your Image: Begin by selecting a high-quality image that would benefit from enhanced lighting. Landscape, cityscape, or backlit portrait shots work best.
- Locate Light Sources: Identify where the natural light source is in the image—such as the sun or street lamps—and plan your flare placement accordingly.
- Select photeeq lens flare Tool: Activate the effect from your software’s effects library or filter menu.
- Adjust Parameters: Use the control panel to adjust the flare’s brightness, angle, size, and spread. Many editors allow real-time preview, so tweak settings until it complements your composition.
- Use Layers and Masks: Apply the flare on a separate layer to preserve your original image. This allows non-destructive editing and easier adjustment. Masks help blend the flare naturally by hiding portions that may look overly bright or unnatural.
- Finalize and Export: Once satisfied, flatten the image if necessary and export in the desired format. Ensure you retain the highest resolution to maintain the quality of the photeeq lens flare.
By following these steps, even novice editors can create visually striking results that appear professionally crafted.
Best Practices for Using photeeq lens flare
To ensure the photeeq lens flare enhances rather than distracts from your image, consider the following best practices:
- Don’t Overuse It: While tempting, using lens flare in every photo can reduce its impact. Reserve it for shots that benefit from added light drama.
- Match the Mood: Choose flare colors and intensities that match the tone of your image. A warm orange flare works well for sunsets, while a bluish hue suits urban nightscapes.
- Avoid Clutter: If your image already has a lot of elements, an added flare might overwhelm the composition. Use flares in minimalistic scenes for better emphasis.
- Check for Natural Light Logic: The flare should correspond with the existing light source in the image. Misplaced flares look artificial and can disrupt realism.
- Complement with Shadows and Highlights: Pairing flares with adjustments to shadows and highlights creates a balanced light flow throughout the image.
Following these best practices ensures that your usage of the photeeq lens flare elevates your visuals in a thoughtful and artistic manner.
Comparing photeeq lens flare to Other Lens Flare Tools
There are numerous lens flare tools available in the digital editing ecosystem. Comparing the photeeq lens flare to alternatives like Adobe Photoshop’s built-in flare, Topaz Glow, and Nik Collection can highlight why Photeeq stands out.
- Adobe Photoshop: While Photoshop provides a lens flare filter, it lacks the real-time interactivity and layer-based flexibility of photeeq lens flare. Photeeq’s version adapts to the image’s depth and is more visually refined.
- Topaz Glow: This plugin focuses more on glow effects than realistic lens flares. The photeeq lens flare is more grounded in simulating real-world optics.
- Nik Collection (Analog Efex): Offers strong vintage and camera-like effects, but flare options are limited. Photeeq offers a broader spectrum of flare types with more granular control.
Ultimately, what sets photeeq lens flare apart is its balance of realism, customization, and integration. It’s designed for photographers who want precise control without sacrificing quality.
Industry Applications of the photeeq lens flare
The photeeq lens flare isn’t just for hobbyists—it has real-world applications in professional fields:
1. Advertising and Marketing
High-impact visuals are essential in advertising. Marketers use the photeeq lens flare to enhance product shots and lifestyle imagery, adding emotion and focus. It can help make a product appear radiant or haloed, subtly suggesting superiority or desirability.
2. Film and Video Production
In post-production, editors apply lens flares to scenes with intense light sources like explosions or car headlights. The photeeq lens flare offers realism and control that’s essential for these applications, aligning it with professional VFX standards.
3. Real Estate Photography
Real estate photographers use lens flares to enhance lighting in property images. A subtle photeeq lens flare on a window or chandelier can give a home a warm and inviting ambiance.
4. Event Photography
Weddings, concerts, and festivals often take place under dynamic lighting. Adding the photeeq lens flare to backlit images can enhance the emotional tone and bring out the magic of the moment.
These applications show how versatile the photeeq lens flare is across various media industries, from digital marketing to cinematic production.
Customizing the photeeq lens flare for Different Styles
The beauty of the photeeq lens flare lies in its adaptability. It can be customized to fit different visual styles and creative directions:
- Cinematic Style: Use elongated, vertical flares with subtle transparency. Combine with color grading for a “movie still” look.
- Dreamlike Fantasy: Choose rainbow-colored circular flares with soft edges. Layer with glow effects to build a surreal atmosphere.
- High-Contrast Editorial: Go for sharp, clean flares with stark highlights. Perfect for fashion shoots or automotive photography.
- Vintage Aesthetic: Use smaller, yellow-toned flares to mimic retro film cameras. Complement with grain textures and vignettes.
Each customization allows photographers and editors to express a unique vision, making the photeeq lens flare more than just a lighting effect—it becomes part of the image’s narrative language.
User Testimonials and Community Feedback
Feedback from the creative community highlights the impact of the photeeq lens flare. Users consistently praise its usability and the quality of its results:
“As a wedding photographer, I’ve tried every lens flare tool out there. The photeeq lens flare is the only one that feels organic and cinematic. My clients always notice the difference.” — Emily R., Wedding Photographer.
“I use it for product shots, and it subtly adds warmth and emphasis. It’s not just a flare—it’s storytelling through light.” — Marcus J., E-commerce Content Creator.
“What I love about the photeeq lens flare is its depth sensitivity. It reacts to my lighting setups instead of overriding them.” — Daniel K., Videographer.
This positive sentiment from across creative disciplines speaks to the tool’s effectiveness and broad appeal.
How Lighting Conditions Affect the photeeq lens flare Outcome
The effectiveness of the photeeq lens flare significantly depends on the original lighting conditions of the image. Natural sunlight, artificial light sources, and low-light environments all influence how the flare appears and integrates.
- Natural Daylight: When used in outdoor shots under sunlight, especially during golden hour, the photeeq lens flare enhances existing warmth and emphasizes natural brilliance. Positioning the flare just beyond the edge of a tree or building can create a photorealistic burst.
- Indoor Artificial Lighting: For indoor scenes, particularly those lit by lamps or chandeliers, using a more diffused photeeq lens flare helps replicate the glow that lens elements would typically reflect. This can be used to highlight architectural details or enhance cozy environments.
- Low-Light or Night Photography: In night scenes, especially urban environments, applying a subtle photeeq lens flare on streetlights or neon signs adds realism. The contrast between the flare and the dark surroundings can intensify mood and focus.
In all cases, users must carefully calibrate brightness, spread, and hue to ensure the photeeq lens flare complements and doesn’t overpower the image.
Integrating the photeeq lens flare in Visual Branding
Modern branding goes beyond logos and color schemes—it includes consistent visual storytelling. The photeeq lens flare can become an iconic part of a brand’s aesthetic when used with intent.
Use Cases:
- Luxury Brands: A subtle golden photeeq lens flare in product photography can suggest opulence and prestige.
- Travel and Lifestyle Brands: Incorporating sun-kissed flares in adventure photos can evoke warmth, freedom, and inspiration.
- Technology Companies: A sharp, bluish photeeq lens flare in digital interface mockups can signal innovation and cutting-edge sophistication.
By applying this effect uniformly across marketing channels—websites, social media, print ads—a brand can establish a visual identity that audiences immediately recognize and trust.
Using photeeq lens flare in Mobile Photography Editing
With mobile photography on the rise, many users want to bring professional-grade effects to their phone snapshots. While photeeq lens flare is best known in desktop applications, mobile users can still benefit from it via apps that support external plugins or integrate similar technologies.
Steps for Mobile Integration:
- Capture with Intent: Take shots with intentional light placement—such as framing the sun or a lamp at the corner.
- Transfer to Editing App: Use apps like Snapseed or Lightroom Mobile, then import to desktop Photeeq-compatible software if needed.
- Apply photeeq lens flare: Once the image is in the editing suite, enhance with photeeq lens flare and re-export to mobile.
- Share on Social Media: The high-resolution, polished look achieved by the flare effect will stand out in competitive digital platforms.
Even casual Instagram users can benefit from this professional touch, bringing their content closer to editorial quality.
Ethical Considerations in Using photeeq lens flare
While artistic expression is paramount in photography and digital design, it’s also important to consider ethical implications. Using the photeeq lens flare to alter perceptions in certain contexts must be handled with care.
Key Points to Consider:
- Photojournalism: Adding flare effects to documentary or journalistic photos can misrepresent reality and breach ethical standards.
- Before-and-After Images: In industries like fitness, skincare, or real estate, adding visual effects like photeeq lens flare in one image but not the other can deceive consumers.
- Social Responsibility: Over-glamourizing images with effects may contribute to unrealistic standards, especially in influencer and beauty photography.
Creators must ask themselves if the photeeq lens flare is enhancing artistic narrative or distorting factual accuracy. In contexts where truthfulness is essential, minimal or no use is recommended.
Creating Thematic Series with photeeq lens flare
Photographers and content creators often work on thematic series—such as seasons, cities, or moods. The photeeq lens flare can be strategically used to bind these images together visually.
Examples:
- “Four Seasons” Collection: A warm flare in autumn and summer, a cool tone in winter, and a pastel burst in spring.
- Urban Exploration Series: Use the photeeq lens flare in reflections off skyscrapers, wet streets, or metallic surfaces to create urban drama.
- Mood-Based Series: For a collection themed around “hope,” soft flares can suggest a light at the end of a tunnel. For “nostalgia,” vintage-toned flares offer emotional depth.
Such creative consistency makes a series feel professionally curated and can elevate a creator’s portfolio or exhibition presentation.
Troubleshooting Common Issues with photeeq lens flare
Even with its powerful features, users may encounter challenges when applying the photeeq lens flare. Here are common issues and how to address them:
1. Flare Looks Unnatural
Solution: Check alignment with the actual light source. Adjust position and reduce opacity to integrate better with the scene.
2. Image Becomes Washed Out
Solution: Lower the flare’s brightness. Use blending modes (like “Overlay” or “Soft Light”) instead of “Normal” to retain detail.
3. Performance Lag in Software
Solution: High-resolution flares can be taxing. Apply flare effects on a lower-resolution copy first, then upscale after adjustments.
4. Flares Obscure Important Image Elements
Solution: Use layer masks to selectively hide parts of the flare over faces, text, or focal points.
5. Color Conflict with Image Tones
Solution: Customize flare color to harmonize with your image’s color palette. Mismatched tones can look jarring and artificial.
By recognizing and resolving these issues, users can confidently integrate photeeq lens flare in diverse projects without compromising quality.
Leveraging photeeq lens flare for Social Media Growth
Social media platforms are highly visual, and the photeeq lens flare can be an asset for content creators looking to stand out in crowded feeds.
Platform-Specific Tips:
- Instagram: Use flares in Reels and Stories to emphasize sunrises, city lights, or product highlights. Consistency in editing style leads to stronger brand recognition.
- Pinterest: High-quality lifestyle pins with tasteful photeeq lens flare overlays tend to perform better in categories like weddings, interiors, and travel.
- YouTube Thumbnails: Adding a lens flare behind a focal point or title can create visual contrast and attract more clicks.
Well-placed flare effects enhance visual hierarchy and create an emotional response, both of which are proven to boost engagement metrics.
Archiving and Cataloging photeeq lens flare Edits for Workflow Efficiency
For professionals managing a large volume of projects, efficient organization of edits is critical. The photeeq lens flare tool supports presets and batch editing, which can streamline workflows.
Tips for Efficiency:
- Create and Name Presets: Save specific flare setups for different themes or clients—e.g., “ClientA-WeddingSoftFlare,” “BrandB-BlueHighlight.”
- Use Metadata Tags: Tag edited images with terms like “photeeq_lens_flare_sunset” to quickly locate them.
- Batch Apply Flares: When working with similar lighting conditions (e.g., an event with consistent lighting), use batch processing to apply the photeeq lens flare across images.
This structured approach saves time, ensures quality consistency, and supports easier collaboration in teams or studios.
Future Updates and Developments in photeeq lens flare
Photeeq is continuously evolving, and the lens flare module is expected to receive future updates that enhance its capabilities even further. Developers have hinted at several upcoming features:
- AI-Powered Light Recognition: Automatically identifies light sources and suggests optimal flare placement.
- 3D Layer Integration: For video editors and 3D artists, this will allow lens flares to respond dynamically to camera movement and depth.
- Preset Libraries: New collections of pre-built flare styles designed by top photographers and filmmakers.
- Mobile Compatibility: Bringing full-featured photeeq lens flare controls to smartphone editors via apps.
These developments will make the photeeq lens flare even more accessible and powerful, cementing its place as a must-have tool in digital content creation.
The photeeq lens flare is a must-have for anyone looking to enhance their visual content with authentic lighting effects. Its versatility and realistic integration make it ideal for a wide range of applications. As visual content continues to dominate digital communication, tools like this one will remain crucial in the toolkit of modern creatives.
By mastering the photeeq lens flare, you don’t just add light to a photo—you add emotion, direction, and professional polish.